Accept Herepay payments on WordPress
From an empty WordPress site to your first paid order, in 13 steps. No code needed.
Before you start
- Admin login to a WordPress site that opens with https:// (a padlock in the address bar).
- Your Herepay live keys: API Key, Secret Key and Private Key, from your Herepay merchant dashboard.
- The plugin file
herepay-for-woocommerce.1.0.3.zip.
Set up the shop
Install WooCommerce
WooCommerce adds the shop, cart and checkout. Herepay plugs into it, so it goes first.
- In the left menu, go to Plugins → Add Plugin.
- Search WooCommerce. On the one by Automattic, click Install Now, then Activate.
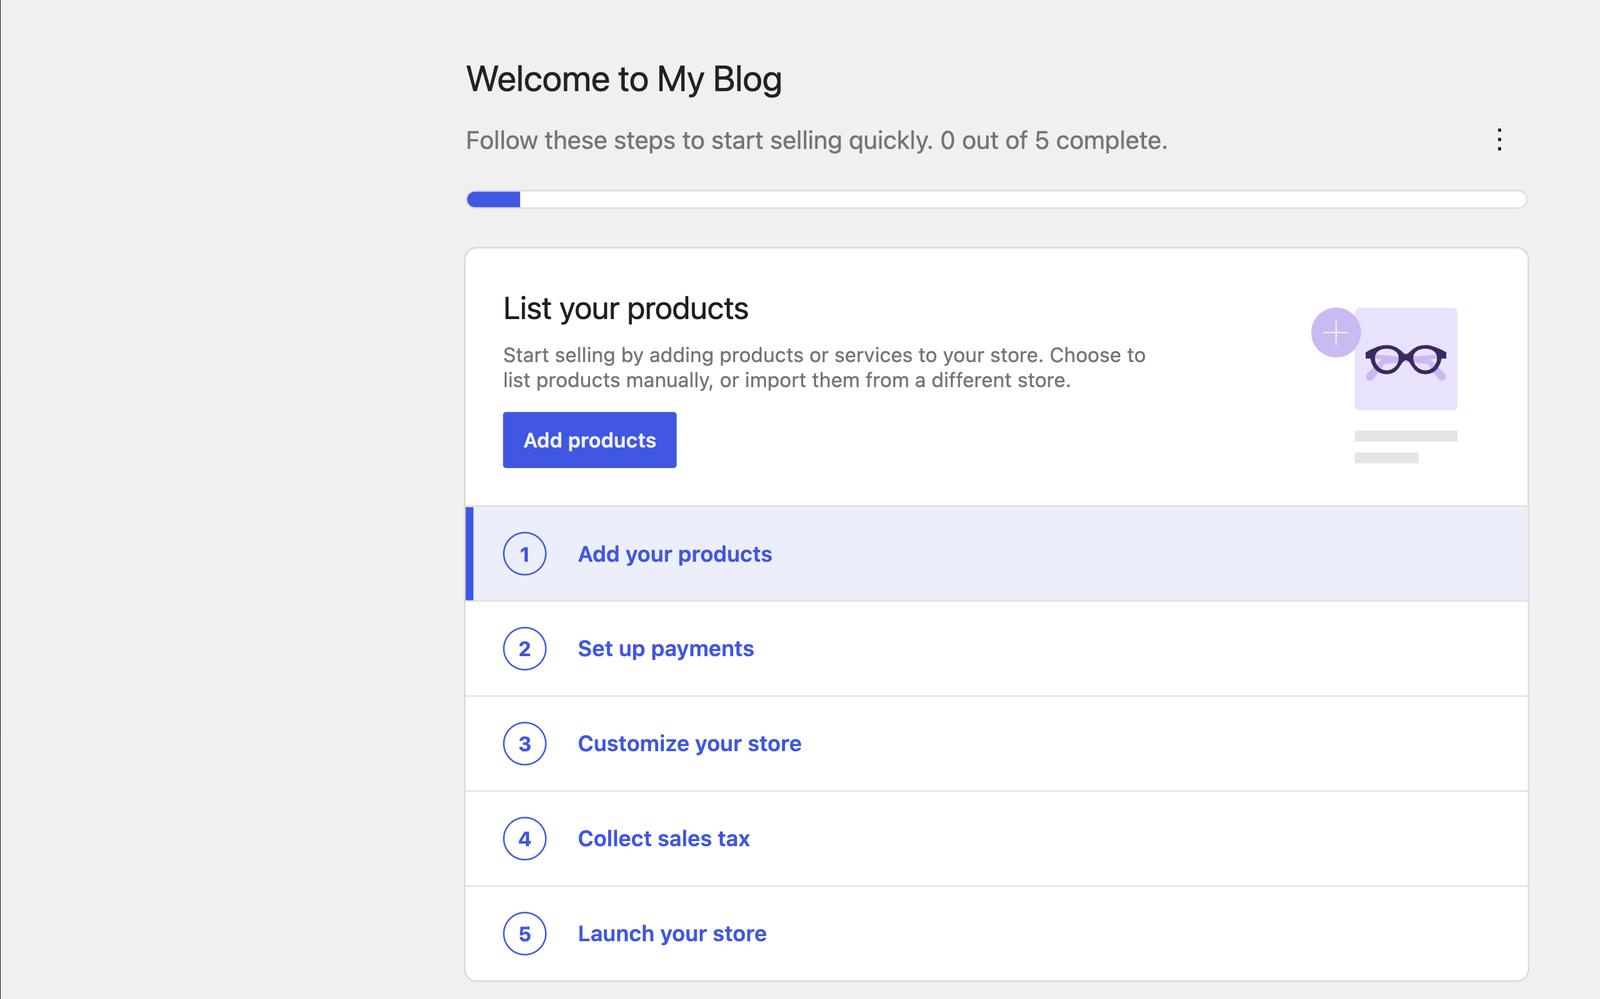
Skip the welcome checklist
WooCommerce opens a 5-task checklist. You can skip it: Herepay replaces “Set up payments”, and you’ll go live at the end of this guide.
Set your country and currency
- Go to WooCommerce → Settings → General.
- Set the store address country to Malaysia.
- Set Currency to Malaysian ringgit (RM) and click Save changes.
Connect Herepay
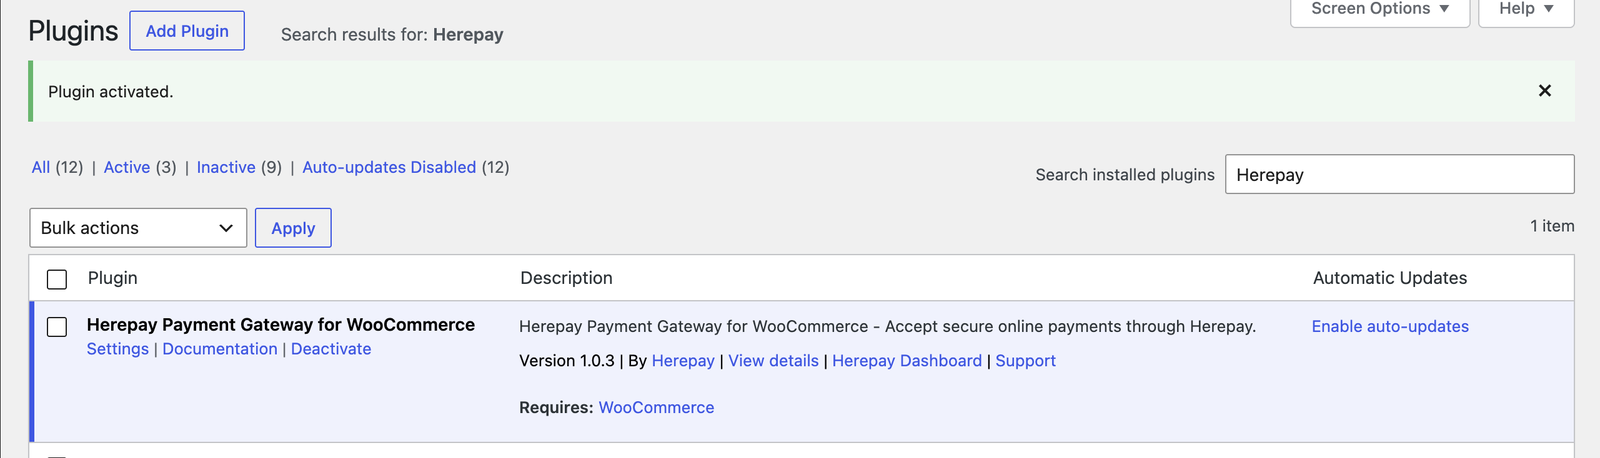
Upload the Herepay plugin
- Go to Plugins → Add Plugin → Upload Plugin.
- Choose
herepay-for-woocommerce.1.0.3.zipand click Install Now, then Activate.
Enter your Herepay keys
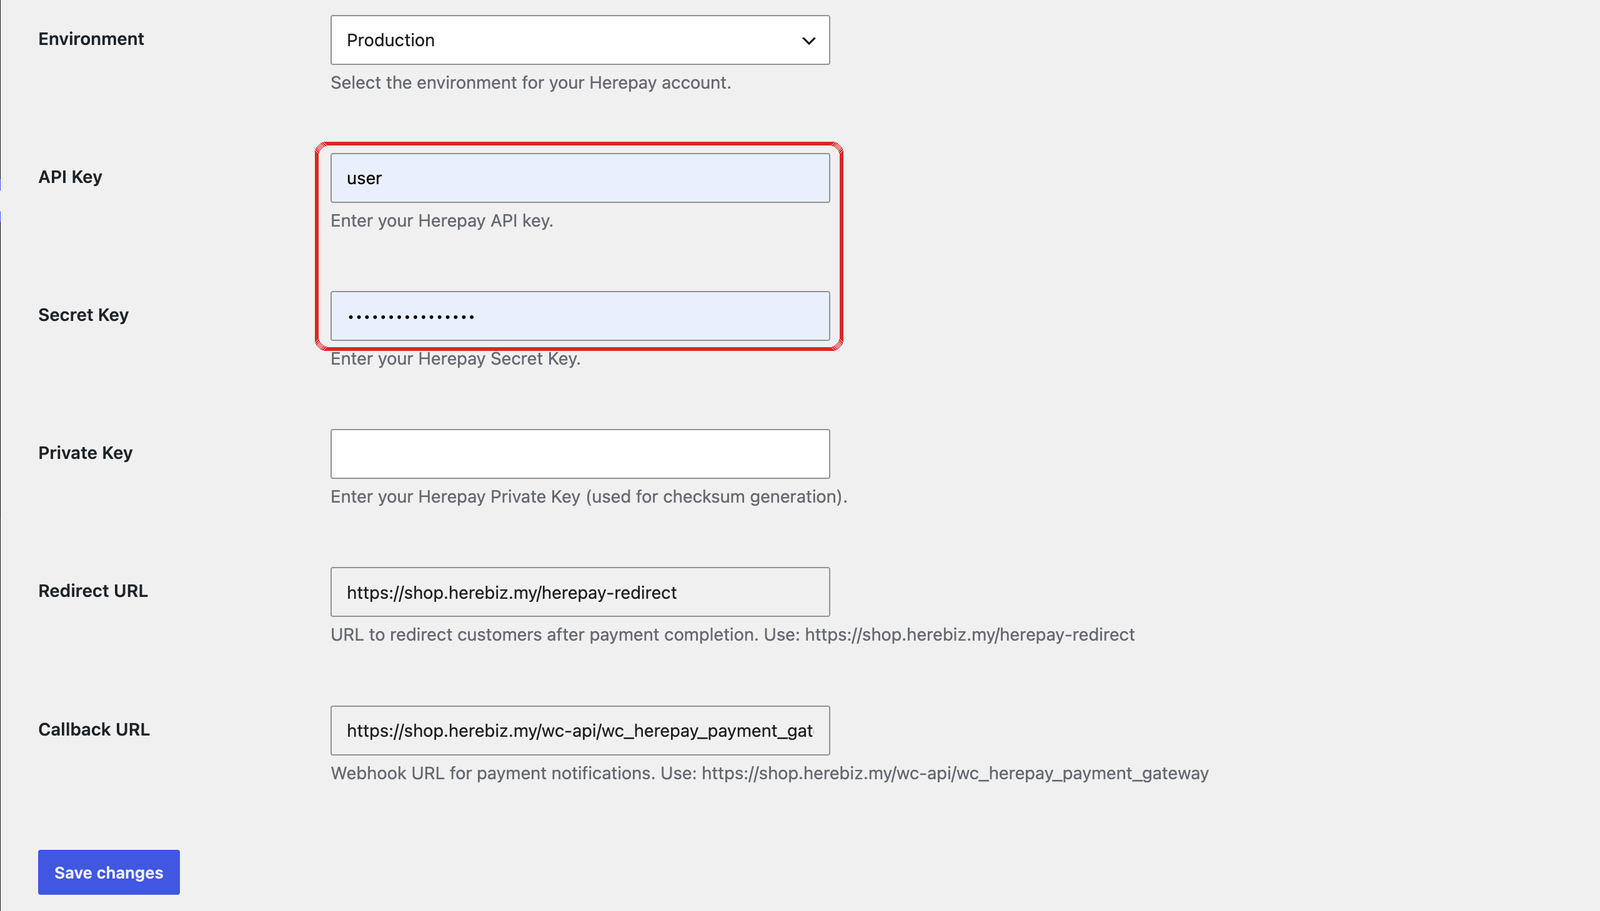
- Under the Herepay plugin, click Settings.
- Make sure Enable Herepay Payment Gateway is ticked.
- Set Environment to Production. It starts on Sandbox.
- Paste your API Key, Secret Key and Private Key, then click Save changes.
Add your shop’s URLs in Herepay
This is how Herepay tells your shop that an order has been paid.
- On the same settings page, copy the Callback URL and the Redirect URL.
- In your Herepay merchant dashboard, open Manage URL.
- Paste the Callback URL as Callback URL, and the Redirect URL as Direct URL. Click Add URLs.
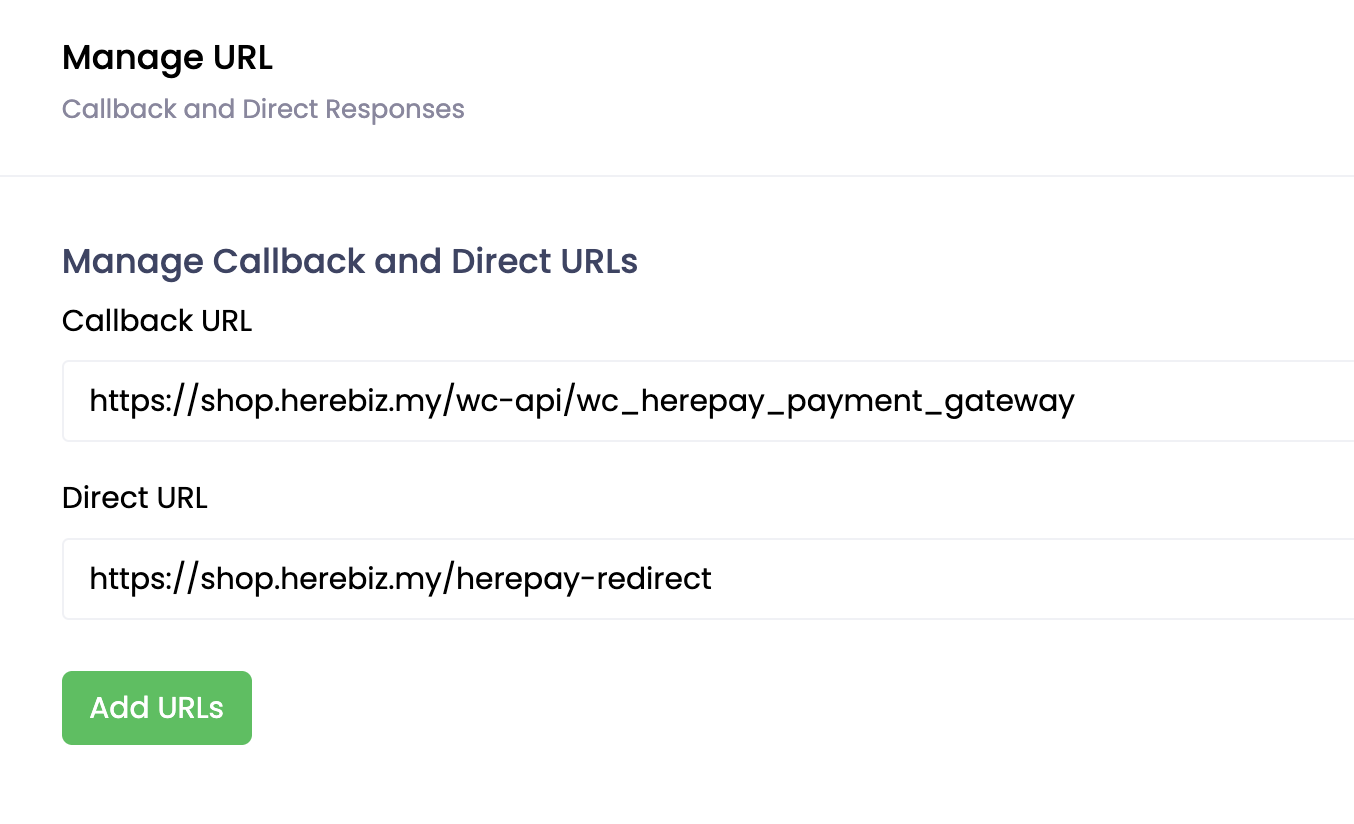
/wc-api/wc_herepay_payment_gateway and /herepay-redirect.Check your permalinks
- Go to Settings → Permalinks.
- Make sure it is not set to Plain. Post name is a good choice.
- Click Save Changes, even if nothing changed. This refreshes Herepay’s links.
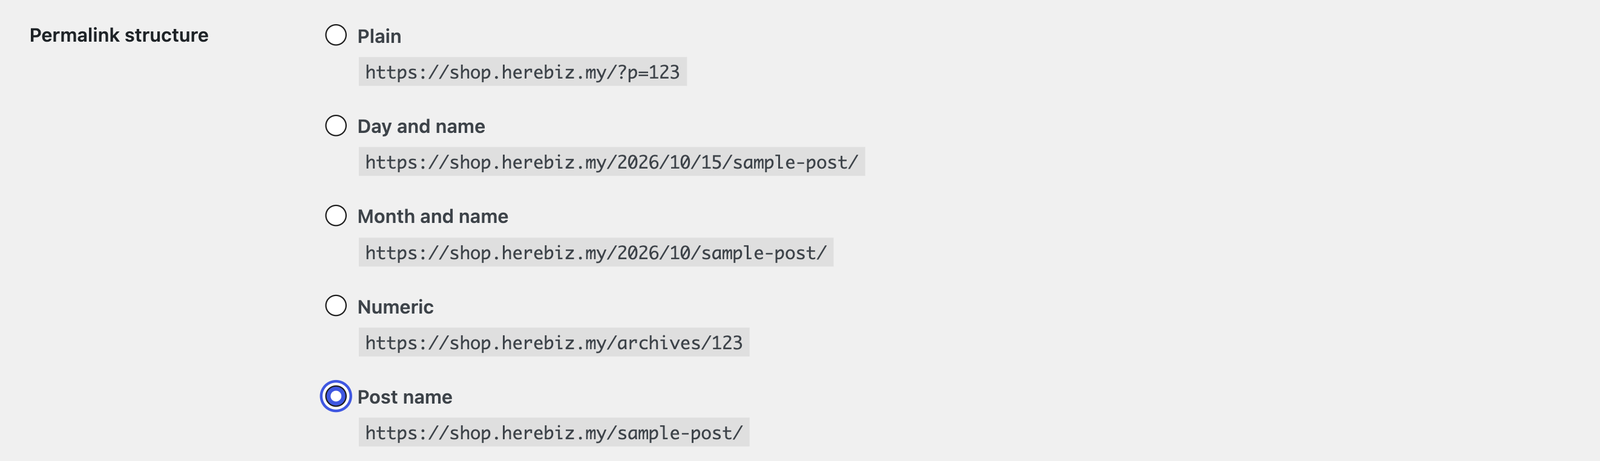
Confirm Herepay is active
Go to WooCommerce → Settings → Payments. Herepay should show Active, and business location should be Malaysia.
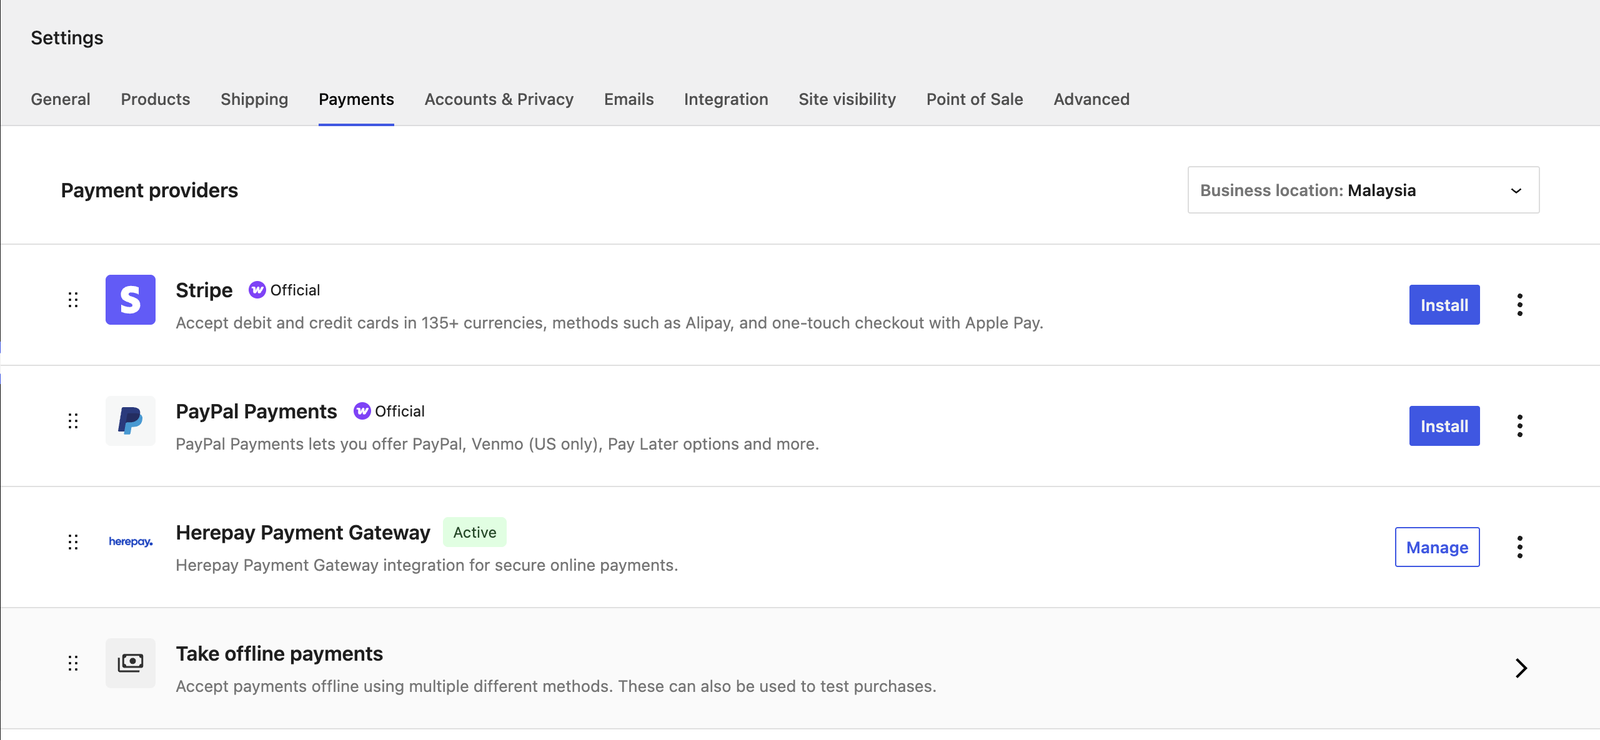
Checkout & your first product
Switch to classic checkout
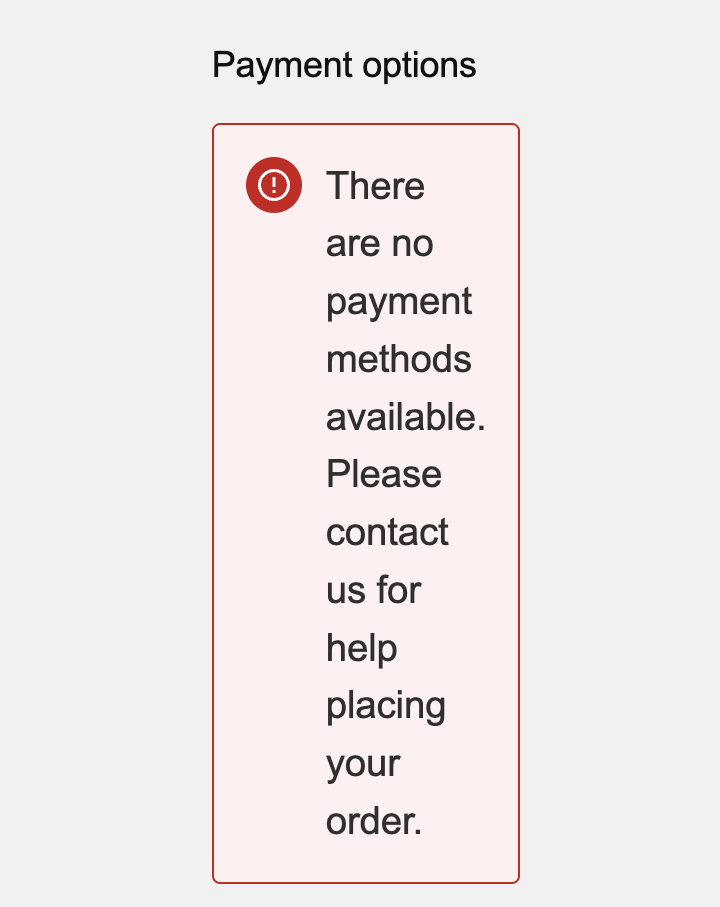
New WooCommerce stores use a “block” checkout, which this version of the Herepay plugin doesn’t support yet.
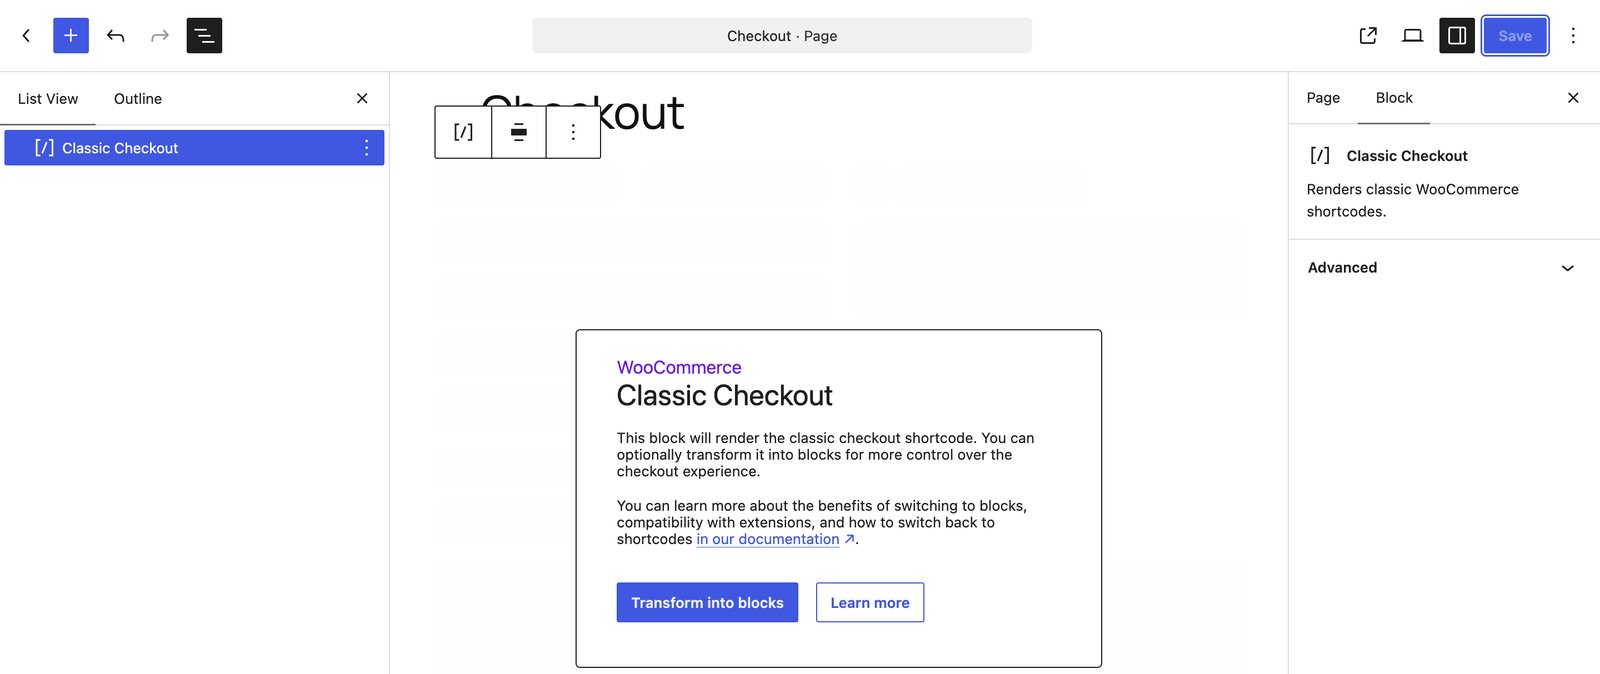
- Go to Pages, hover over Checkout and click Edit.
- Open List View (☰ at the top left) and click Checkout.
- In the right sidebar’s Block tab, click Switch to classic checkout. Then click Save.
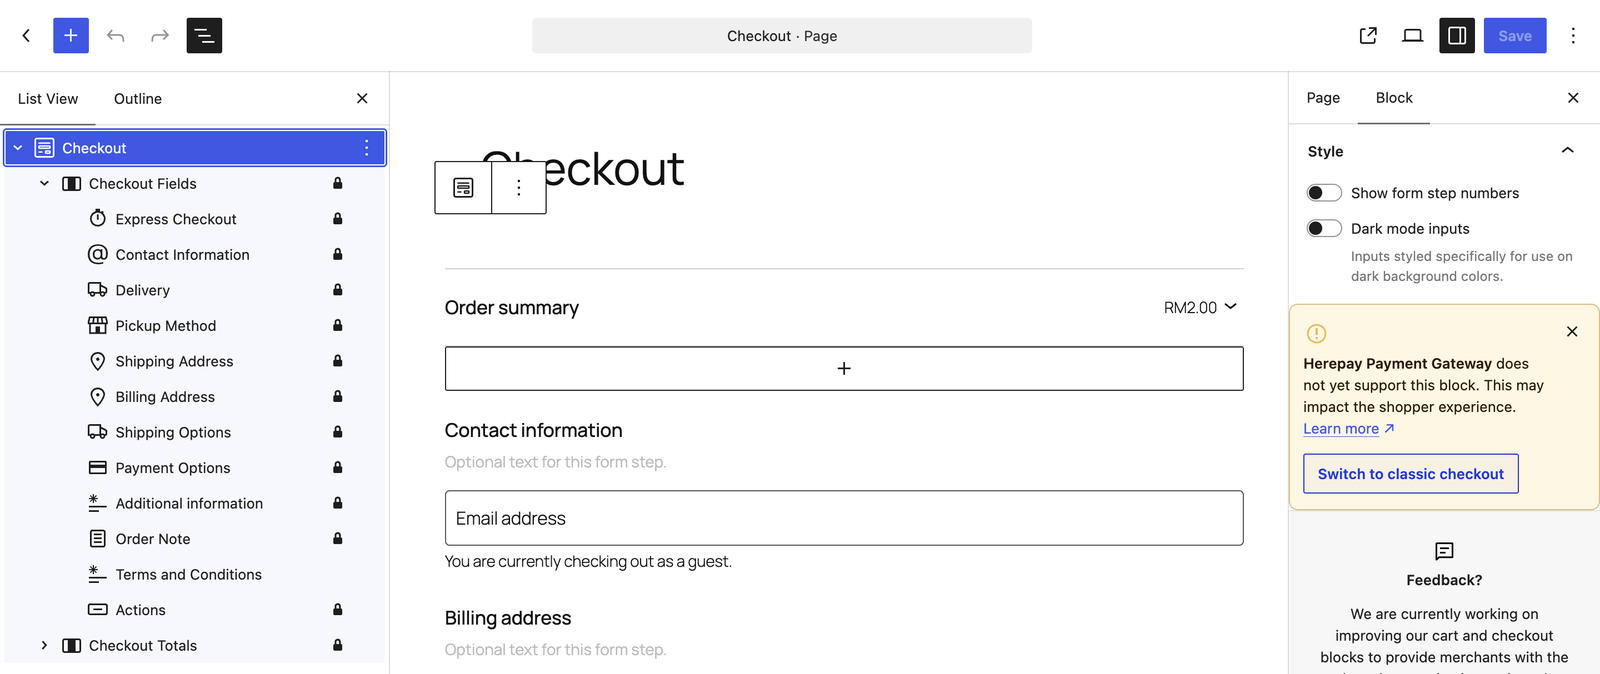
Add a product
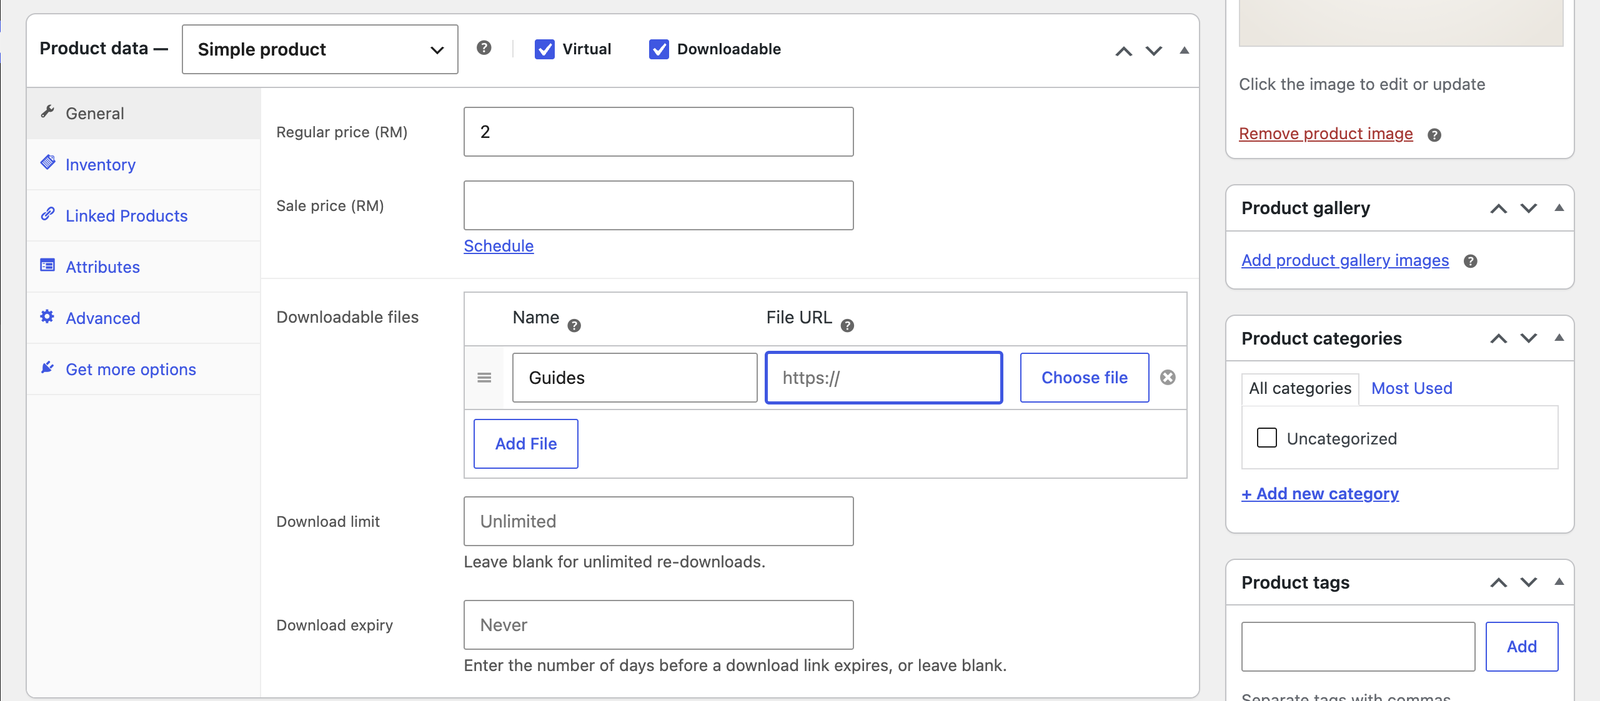
- Go to Products → Add New Product. Enter a name and a short description.
- In Product data, enter the Regular price. It should show (RM).
- Nothing to deliver? Tick Virtual. Selling a file? Also tick Downloadable and add it under Downloadable files.
- Click Set product image, then Publish.
Test & go live
Buy your own product
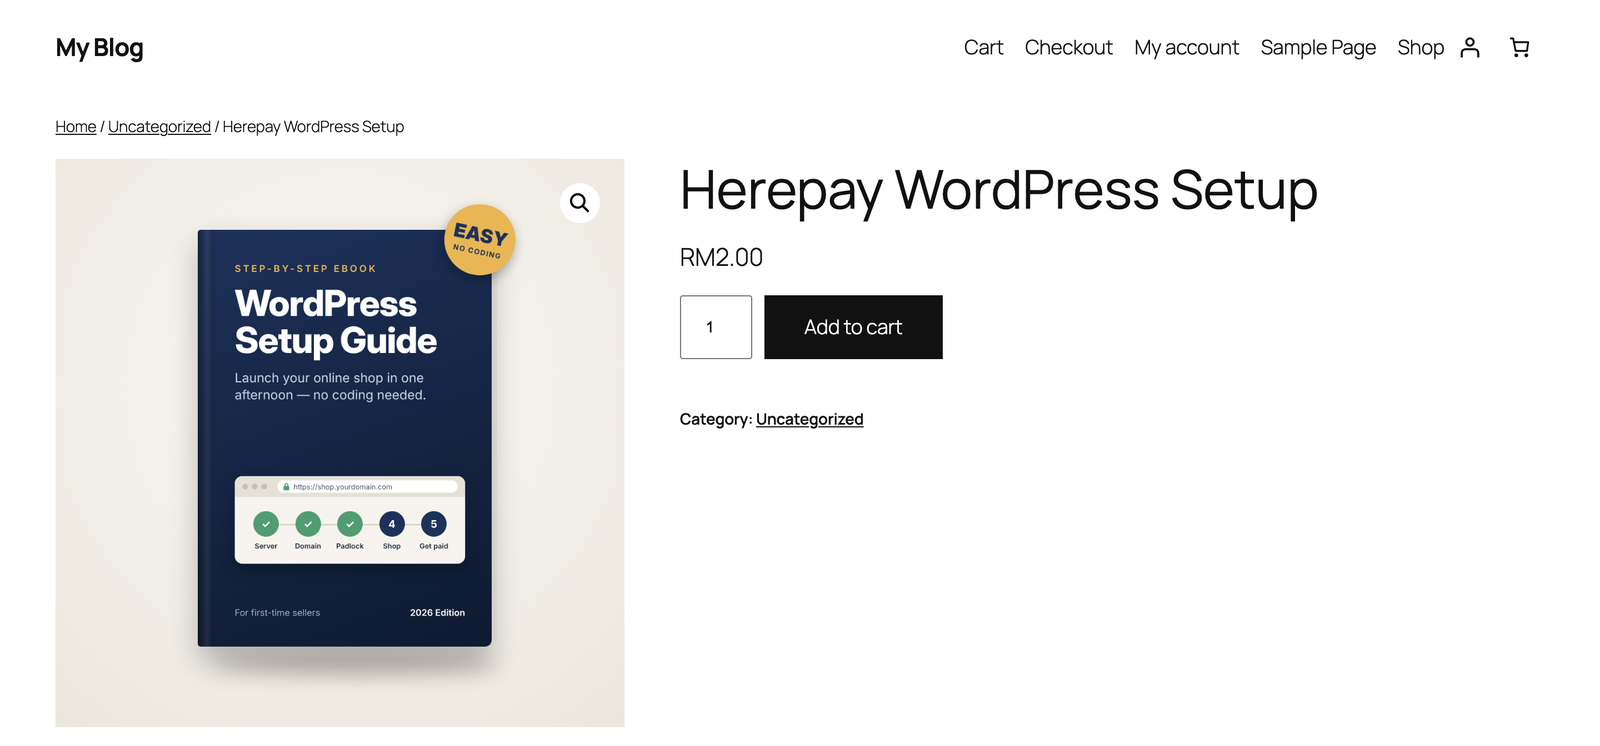
- Open your product, click Add to cart, then go to Checkout.
- Fill in your details and choose Herepay. Pick your bank from the list.
- Pay on your bank’s page and follow the screens back to your shop.
Check the order was marked as paid
Go to WooCommerce → Orders. Your test order should change to Processing or Completed on its own. Refund the test from your Herepay dashboard if you like.
Go live
Go to WooCommerce → Settings → Site visibility, choose Live and click Save changes. Your shop is now open to everyone.
If something goes wrong
| What you see | What to do |
|---|---|
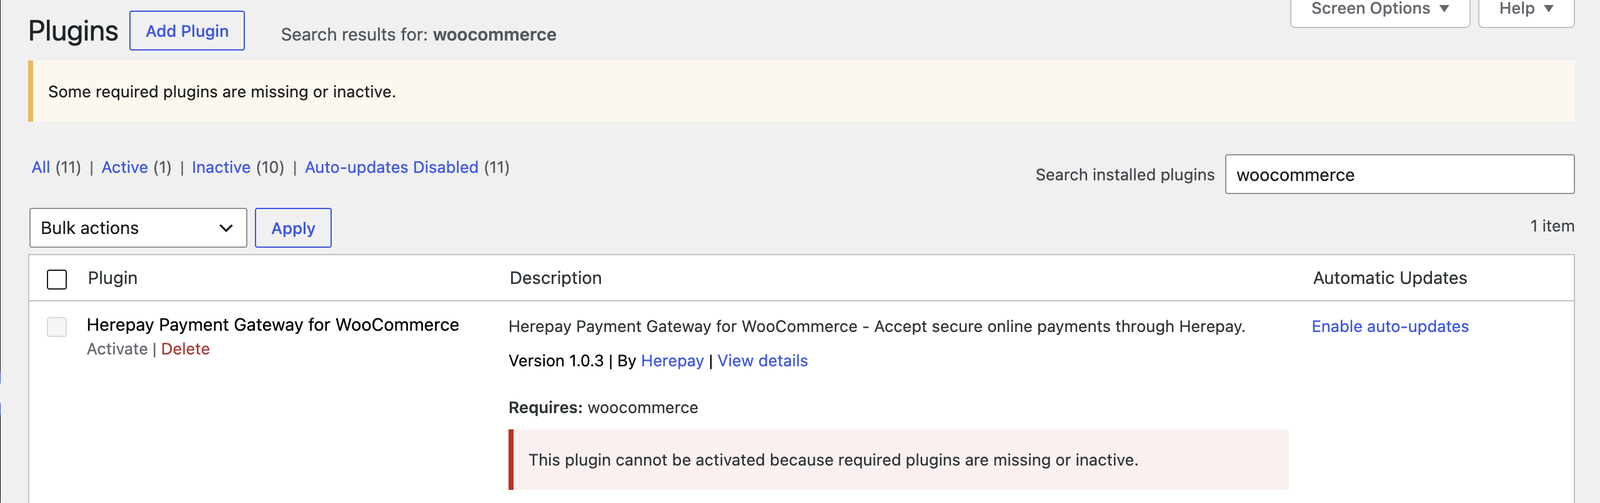
| “This plugin cannot be activated because required plugins are missing” | Install and activate WooCommerce first (step 1). |
| “There are no payment methods available” at checkout | Switch to classic checkout (step 9). |
| Payments fail; API Key shows “user” | The browser auto-filled your login. Paste your real Herepay keys (step 5). |
| Payments fail even with the right keys | Check Environment is set to Production when using live keys (step 5). |
| Order stays on “Pending payment” after paying | Check the Callback URL in Herepay’s Manage URL (step 6) and that permalinks aren’t Plain (step 7). |
| Prices show in $ instead of RM | Set the currency to Malaysian ringgit (step 3). |
See it working.
Buy the setup guide and pay with Herepay yourself.